If you follow me on Instagram you would have seen this wrapped wool wall hanging that I made over the Christmas holidays… while binge watching Outlander on Netflix!
This wool wall hanging is very big on impact but surprisingly easy to make – you don’t need any craft skills, just lots of wool. I’m so happy with how it turned out, it really looks amazing hanging in my apartment. The finished size is 80cm x 165cm so clear some wall space!
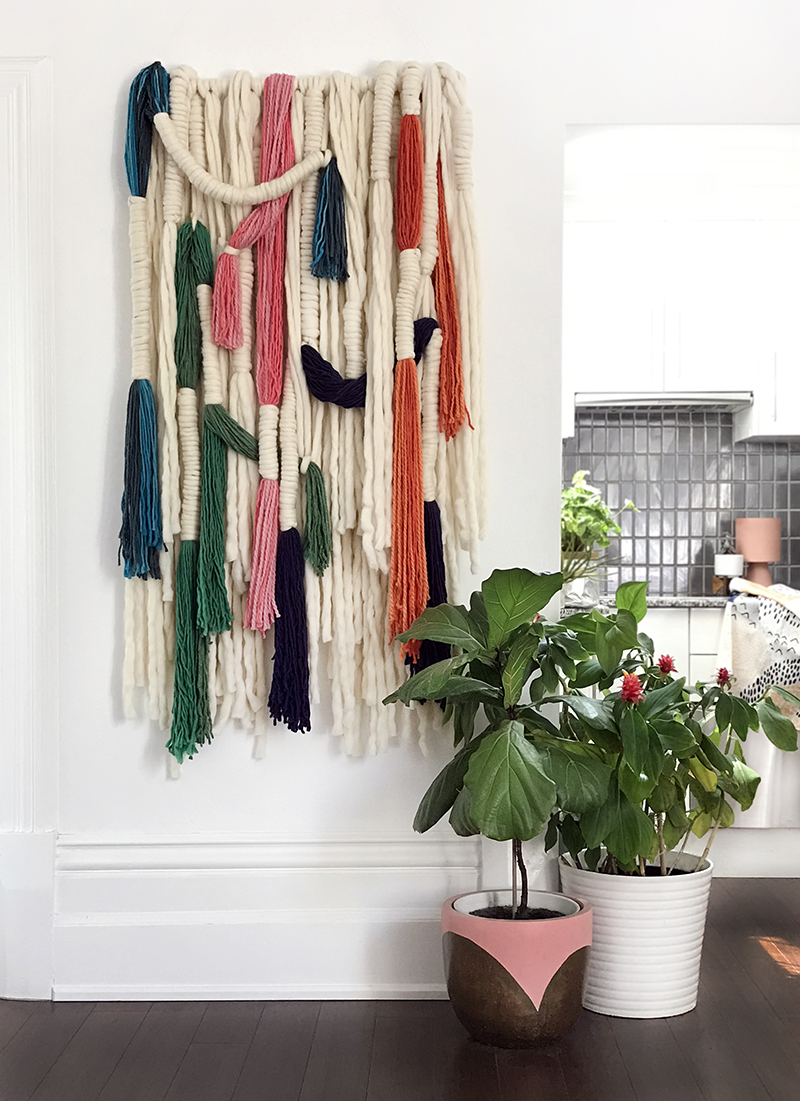
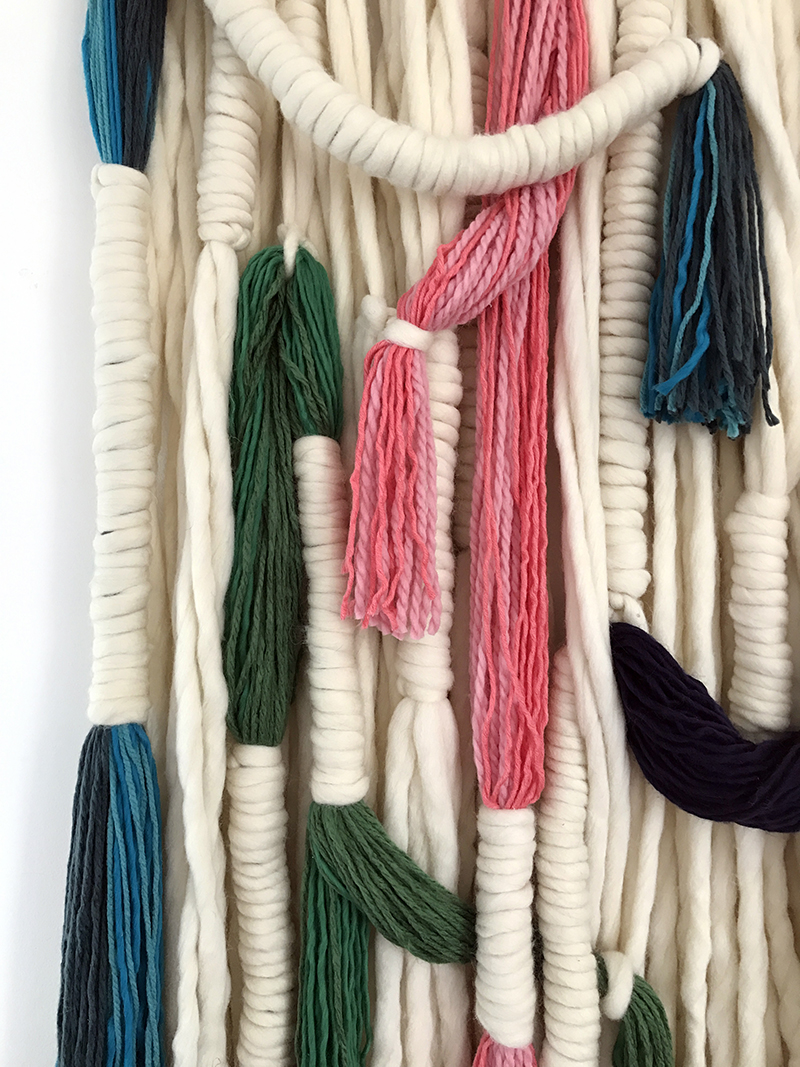
How to make a wrapped wool wall hanging
You’ll need
Coloured wool. I used 4-5 balls of 12 ply wool for each of the 5 colours: teal, green, indigo, pink and orange. Use tonal variations of each colour like I did, or stick to a single colour.
Wool roving. I used about 8 skeins of “Super Duper” wool yarn from Lincraft. Each skein is 26 metres in length and weighs 220 grams.
15mm diameter piece of dowel cut to 75cm in length.
Fishing line or white twine to hang the wall hanging.
Let’s get started…
Make the wall hanging base
Cut 30 lengths of the wool roving, each measuring 360cm. Start by measuring one length, lay it on the floor, then measure the rest of the pieces on it.
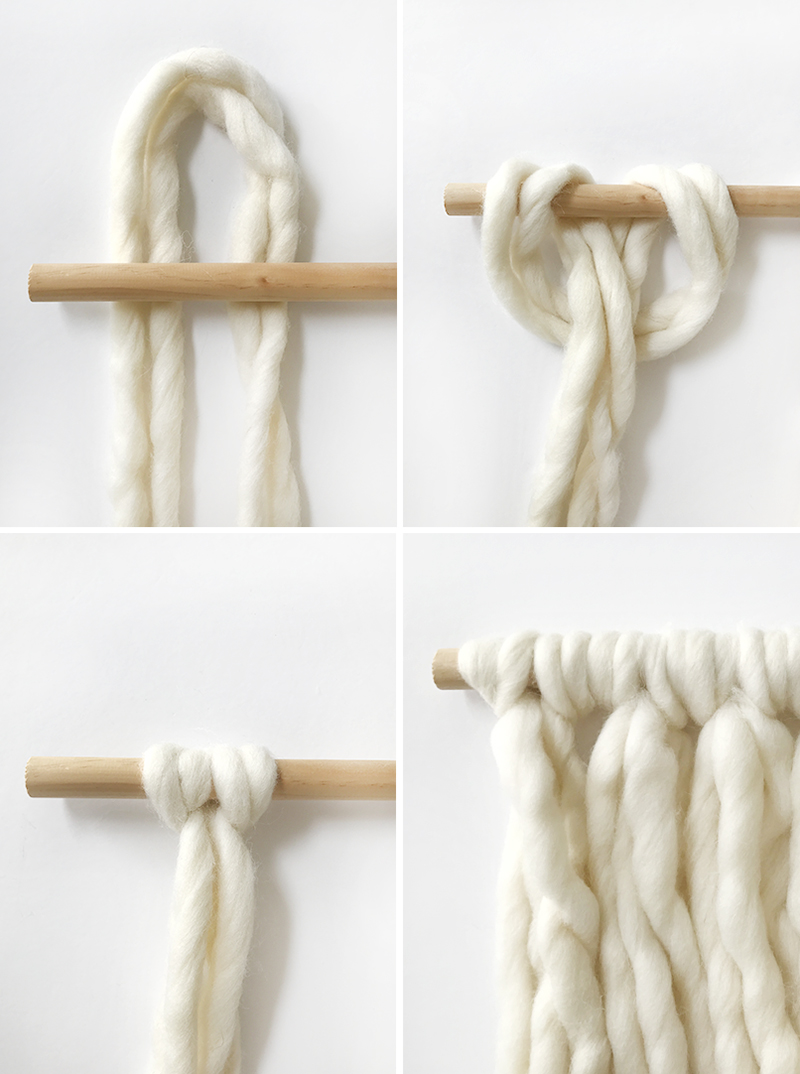
Starting about 1cm from the edge of the dowel, fold two pieces of roving in half and knot them together over the dowel as shown below. Repeat 15 times (30 lengths of wool). Pull the knots tight and push them close together along the dowel.
Tie a length of fishing line to the ends of the dowel and hang the wall hanging up. It’s easier to work on it this way.
Make the coloured sections
Cut the coloured wool to 230cm lengths. I wrapped the wool around and around the top of my TV. You could also position a couple of chairs to wrap the wool around. Once I’d wrapped the whole ball of wool around the top of the TV I slid it off and cut through one folded end. Lay the wool out on your work surface.
Repeat with all the balls of coloured wool.
Make the roving sections
Cut 30 pieces of wool roving to 230cm lengths. Use the same process as for the coloured wool.
Group the lengths into five piles of 6 pieces.
Wrap the sections
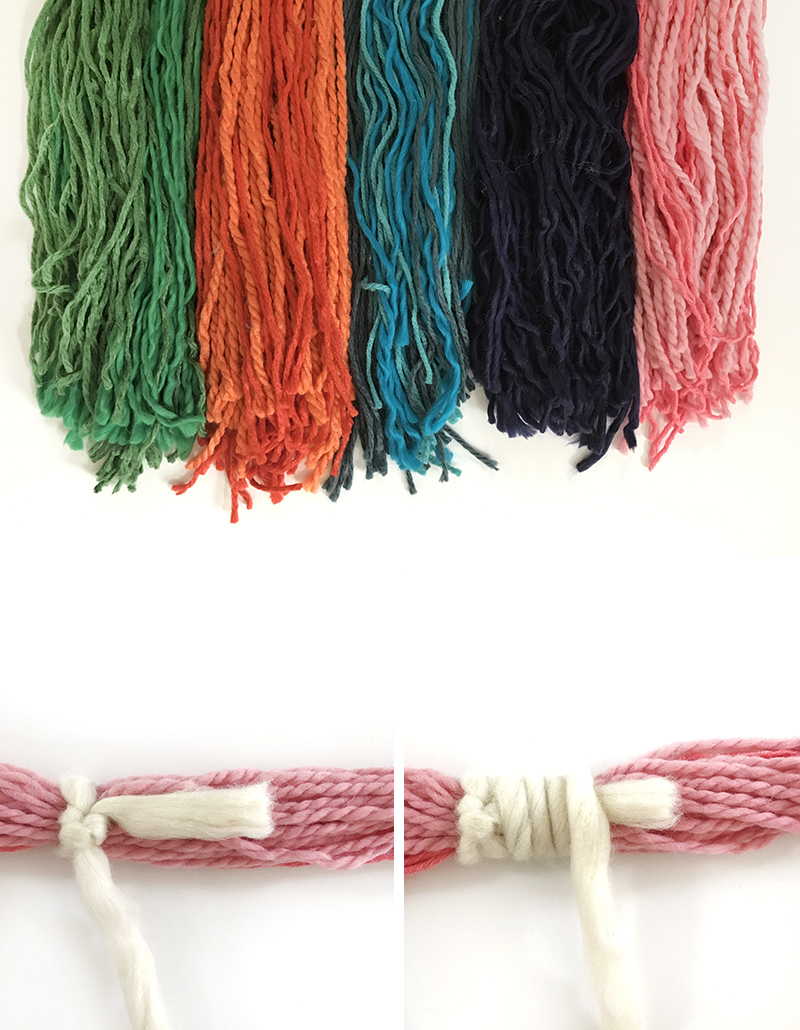
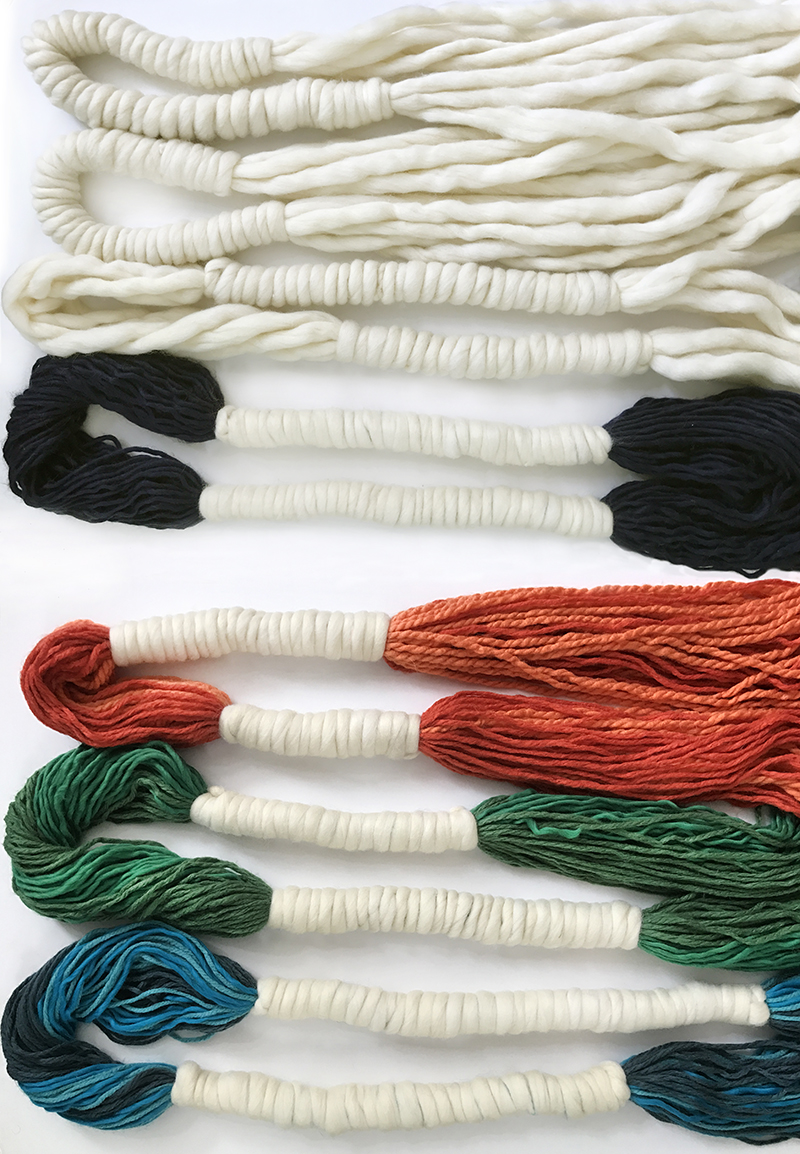
Wrap two parts of each coloured wool section except for the pink, which has one section wrapped. Vary the lengths of wrapped and unwrapped areas.
Finish off the wrapping by looping the end of the roving back under the last wrap. Tie it off and tuck the end under the wrap.
Wrap the roving sections in the same way (the photo below shows 3 roving sections, but there are 5 in total).
Assemble the wrapped wool wall hanging
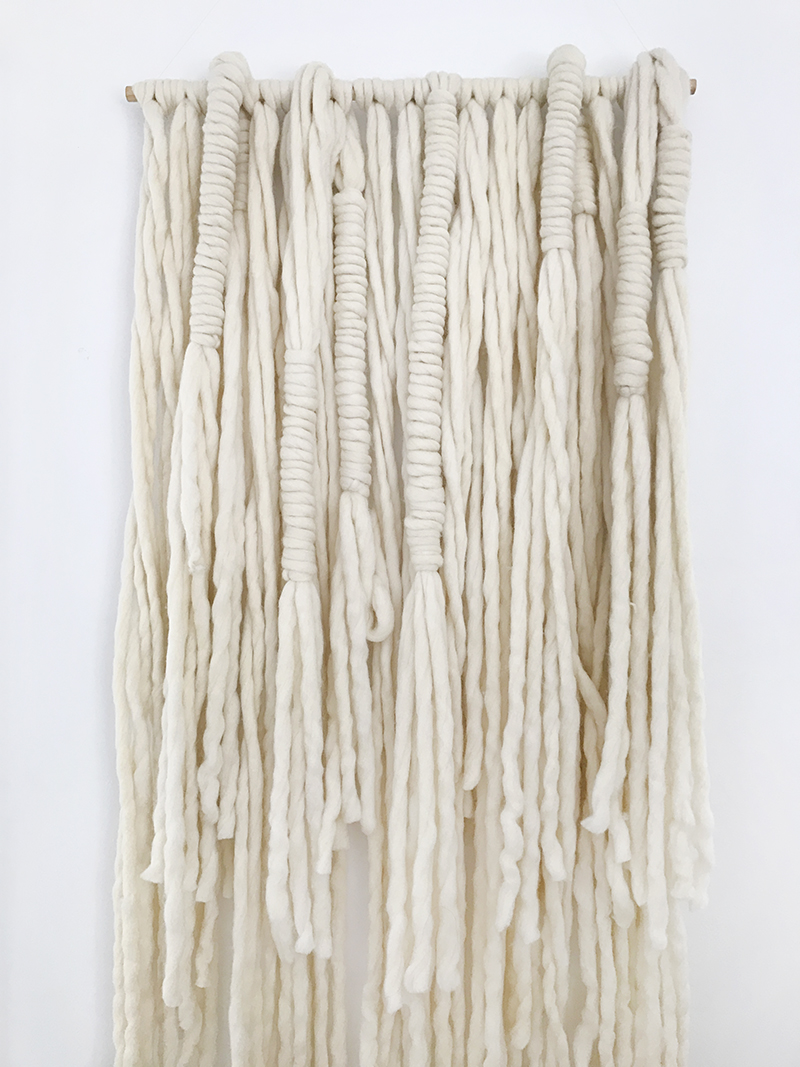
Hang the wrapped roving sections over the dowel, as pictured below. Bring the back half of each wrapped section through to the front of the wall hanging so they are visible.
Now add in the coloured sections.
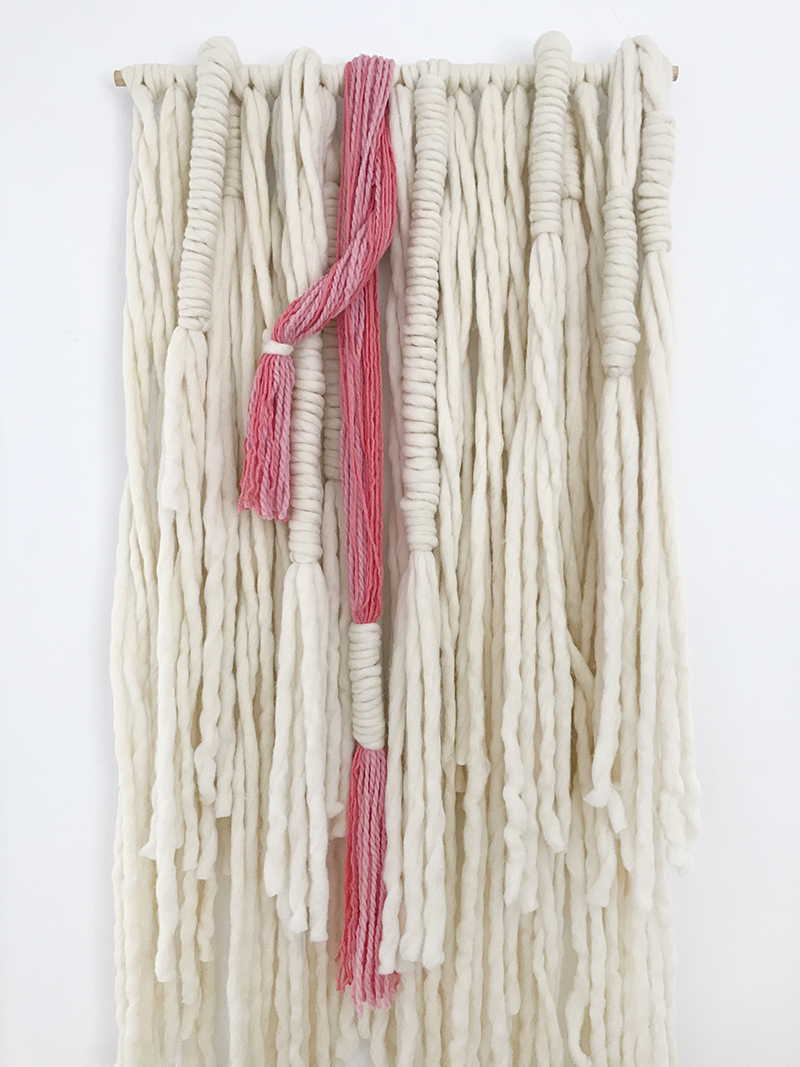
Start by folding the pink section over the centre of the dowel. Bring the back half through to the front of the wall hanging, loop it across (as show below) and secure it by tying it with a piece of the roving from the ‘base’.
Add in two more coloured sections, looping some across others.
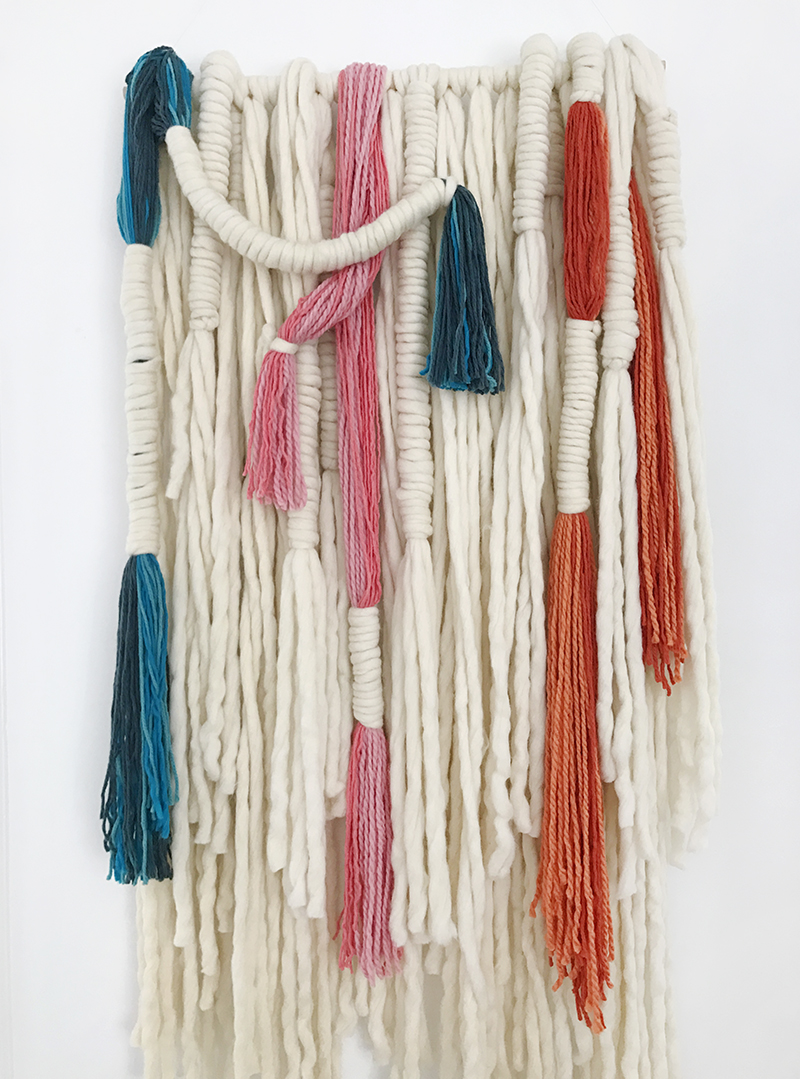
Join the final two sections (green and indigo) at intervals down the wall hanging using a piece of roving from the ‘base’. While assembling the wall hanging keep stepping back to see the whole design to make sure the placement is balanced.
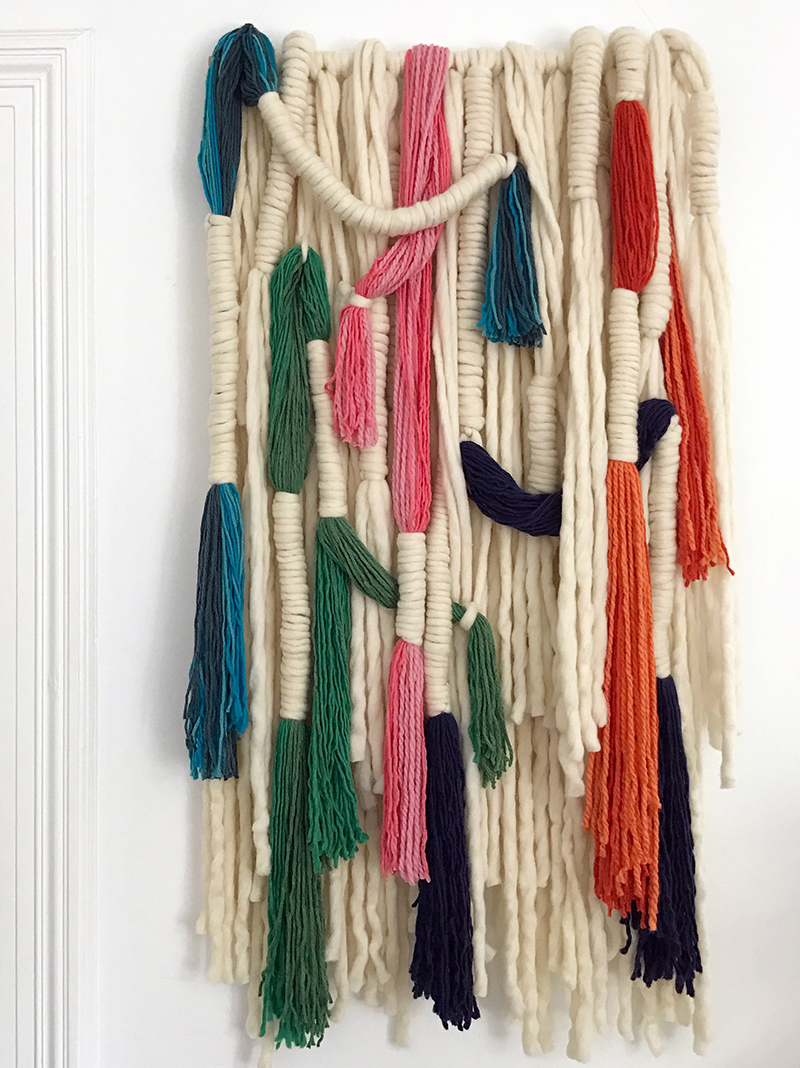
Now step back and admire your statement wall hanging!
If you’re looking for other DIY ideas for your home head to the Craft + DIY page. You might like to make a pom pom wall hanging or an easy collage cactus artwork if you have wall space to fill.
If you make any of my craft tutorials I’d love to see your creations. Share them on Instagram with the hashtag #wearescoutcraft and tag me @we_are_scout_lisa